How do you sharpen with a HORL 3?
Sharpening a knife with a HORL 3 is surprisingly easy. In no time, your kitchen knives will be razor-sharp again. We'll show you exactly how it works!
What is the HORL 3?
Let's start by giving some more information about the HORL 3. When you sharpen your knife with a 'normal' sharpening stone, you move the knife over a sharpening stone. The HORL is different, because with this system you roll the stone alongside the edge of the knife. You don't need water, and a magnet ensures that your knife will automatically use the right sharpening angle.
What do you need?
You want to sharpen your knife with the HORL 3: what do you need?
- A blunt kitchen knife. You need something to sharpen.
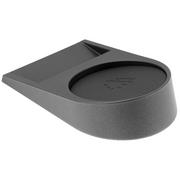
- The HORL 3 knife sharpener, consisting of the sharpener itself and the magnetic base that holds the knife in place.
This is how you sharpen your knives with the HORL 3
The sharpening angles of the HORL 3
Sharpening with the HORL 3 is a real piece of cake. You start by placing your knife against the magnet. Go with a 15 or 20-degree sharpening angle. The 15-degree sharpening angle is mostly suited for Japanese kitchen knives. The 20-degree angle is great for Western kitchen knives. The steel of a Western knife is namely a little softer. It cannot be sharpened at a 15-degree angle. Because this system allows you to also sharpen at a 20-degree angle you can also use the HORL 3 to sharpen most pocket knives. The HORL 3 Pro offers the option of sharpening at the following angles: 10º, 13º, 15º, 20º, 22º and 25º.
How to sharpen using the HORL 3
When you attach the knife to the magnetic base you move the system alongside the knife. You start with the diamond-coated, medium-coarse sharpening disc. With it you ensure that your knife is quickly straightened out and enhanced with a fixed sharpening angle. You start by sharpening one side of the knife. Then you rotate the knife off its magnetic base and reattach it to sharpen the other side. How long you need to sharpen each side depends on how dull the knife is, but longer than a minute per side is rarely needed!
Afterwards you turn the sharpener over and use the fine ceramic sharpening disc. With it you make sure your knife will be razor-sharp in no time. You also do this approx. one minute per side. And that's it! Your knife will be good as new again. It is that simple.
Do make sure that after you sharpen your knife you clean the silicone rubber and the knife to prevent scratches.
Differing sharpening angle? This is how it works with the HORL 3
With the magnetic base you secure your knife at a 15 or 20-degree angle. But what if your knife is sharpened at a different angle, for instance at 22 degrees? No problem at all! You can choose the HORL 3 Pro, but you can still simply sharpen your knife with the ‘standard’ HORL 3 knife sharpeners.
You can easily determine the sharpening angle of your knife yourself. As long as you sharpen at the same angle for long enough, the knife will naturally take on that angle. On our website, we list the sharpening angle as we measure it, but this can vary slightly from knife to knife. Factory-made knives often have small differences, so a stated angle of 20° might in practice be 18° or 22°. No problem! Read more here about the facts and myths of sharpening angles.
Stay as close as possible to the original sharpening angle. So if your knife has a sharpening angle of 22°, don’t use the 15° side to make it ‘sharper’, but use the 20° side instead. Sharpen a little longer with the medium diamond sharpening stone, and your knife will naturally take on the correct angle.
Exchanging the HORL 3 sharpening discs
The HORL 3 comes with two sharpening discs: a medium-coarse diamond-coated sharpening disc and a fine ceramic sharpening disc. But you can also use sharpening discs with a different grain size. You can easily exchange the discs. With the HORL 3, this is even easier than with previous models. Thanks to the HORL Quick Lock system, loosening and changing the sharpening discs is quick and easy — done in a single twist. With the HORL Quick Lock and interchangeable sharpening discs, you’ve got all the options at your fingertips. Just a small note: the sharpening discs from the HORL 2 are not compatible with the HORL 3.
Check out all HORL knife sharpeners here.


